
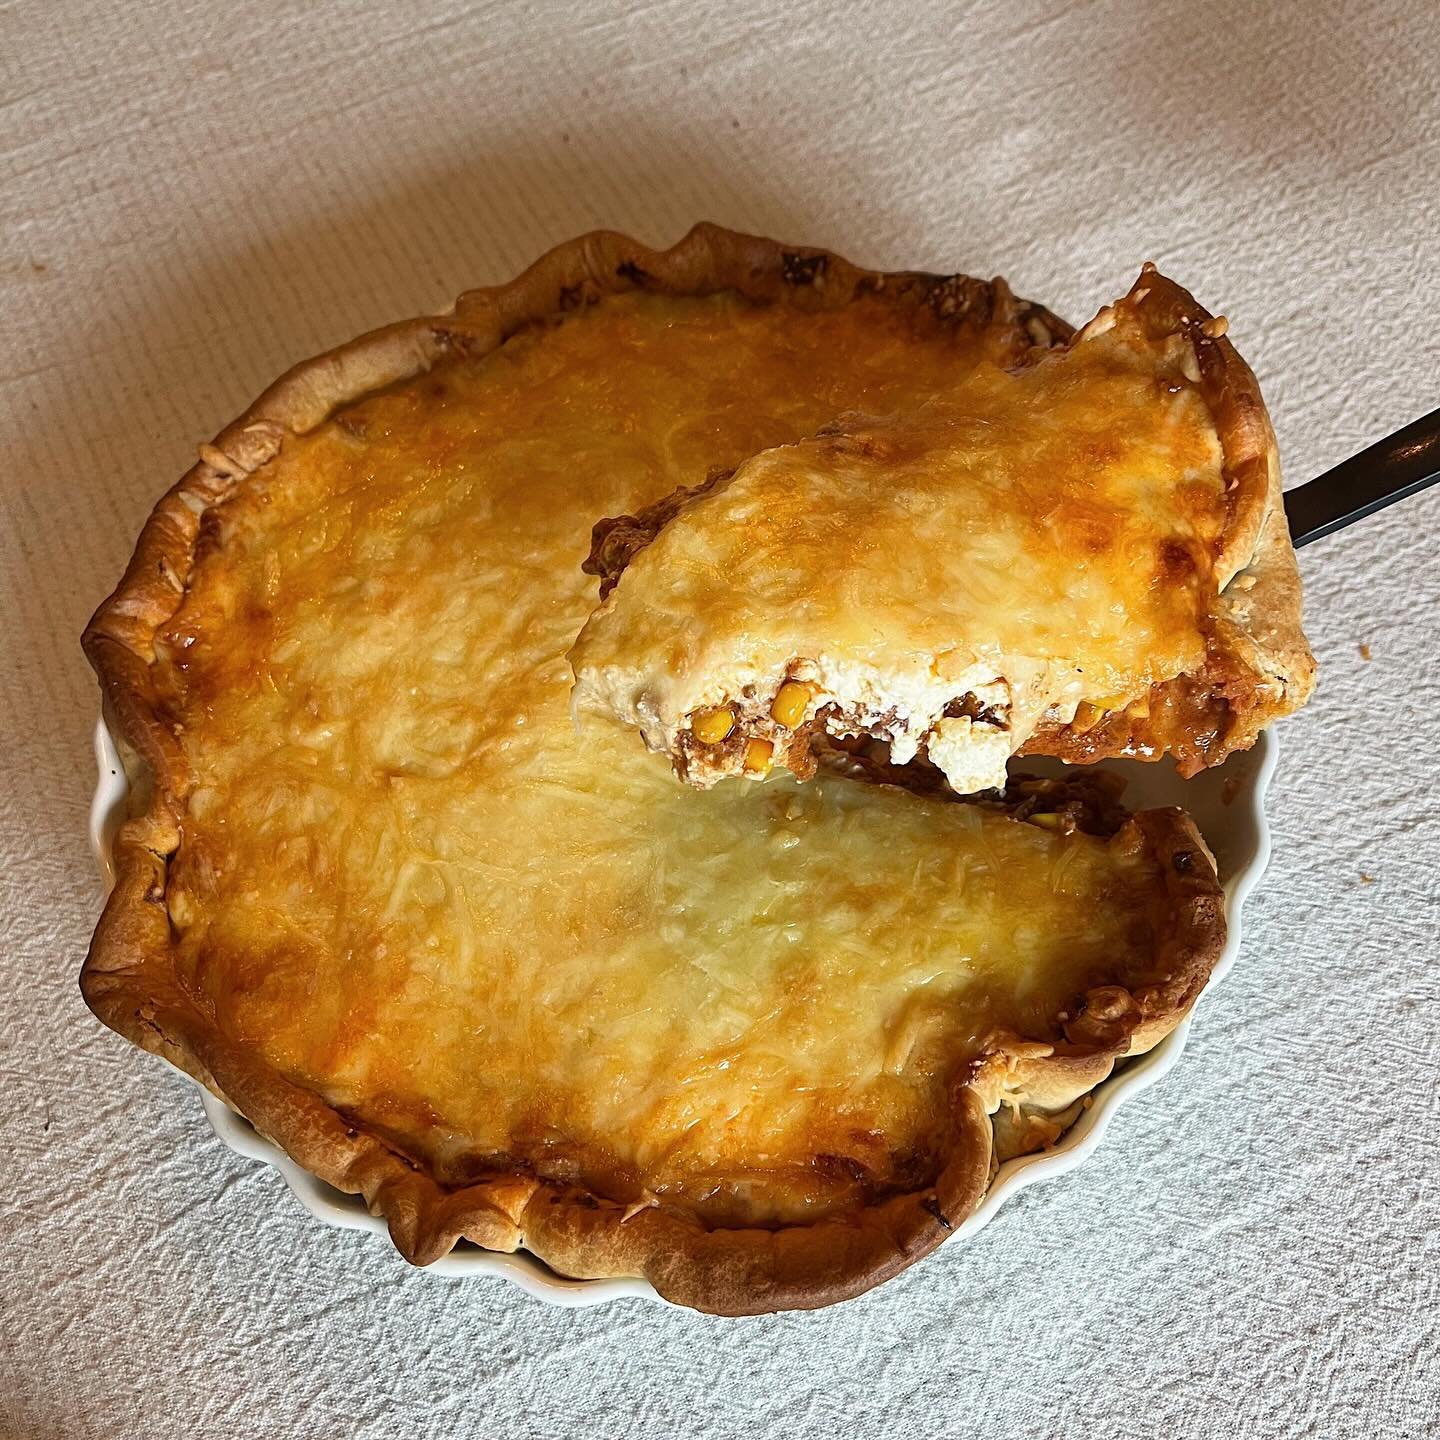
Ground Beef Taco Pie

The first time I made this I skipped the simmer and dumped the corn straight into a loose, watery pan of beef. The crust went soggy in about twenty minutes. Big mistake. Now I let the tomatoes cook down until a spoon dragged across the skillet leaves a clean line, and I give the crust its 8 minutes alone in a 400°F oven before anything goes in it.
Store-bought crust is what I use on most weeknights, honestly, and I don’t feel bad about it. The part I like best is the thick white layer of sour cream under the cheese, which stays soft and tangy against the spiced beef while the top blisters and browns at the edges. Cut it after 10 minutes or the slices slump. We eat it with a plain green salad on the side.
This ground beef taco pie is taco night in slice form, with a flaky crust and a golden cheese top. It feeds six, and there aren't any tortillas to warm. The wedges come out tall and saucy. Leftovers keep 3 days in the fridge and reheat in a 350°F oven in about 15 minutes.
Ingredients
Equipment
Method
- Heat the oven to 400°F. Press the pie crust into a 9-inch deep pie dish, pinch the edge into a rustic rim and prick the bottom all over with a fork. Bake for 8 minutes, then set the dish on a rack.1 refrigerated pie crust
- Cook the ground beef and onion in a large skillet over medium-high heat for 8 to 10 minutes, breaking up the meat, until no pink remains and the onion is soft. Spoon off the excess fat.1 lb ground beef, 1 yellow onion
- Stir in the taco seasoning and the diced tomatoes with their juice. Simmer uncovered over medium heat for 8 to 10 minutes, stirring now and then, until a spoon dragged across the skillet leaves a clean line.1 packet taco seasoning, 1 can diced tomatoes
- Take the skillet off the heat. Stir in the drained corn, 1/4 cup of the sour cream and 1/2 cup of the cheese until the cheese melts into the sauce.1 can whole kernel corn, 1 1/4 cups sour cream, 2 cups shredded Mexican cheese blend
- Spoon the filling into the prebaked crust and smooth the top with the back of the spoon.
- Spread the remaining 1 cup of sour cream over the filling in an even layer, right up to the crust. Sprinkle the remaining 1 1/2 cups of cheese over the top.
- Bake for 20 to 25 minutes, until the cheese is melted and browned in spots and the crust is deep golden. Let the pie rest for 10 minutes before cutting it into 6 wedges.
Nutrition
Notes
Swap the sour cream for crème fraîche if you can find it, since that's how this pie is usually made in Norway. Cover the crust edge with foil if it browns before the cheese does.
You might also like our Cheesy Cottage Pie.



made this sunday w ground turkey bc thats what i had and it still worked. simmered the tomatoes the full 10 min like you said and the bottom stayed crisp. my kids picked out zero corn which is a first
good flavor but mine took almost 30 min to brown on top, oven might run cool. also a bit salty w the full packet so next time im using a little less seasoning
used a frozen deep dish crust instead of the rolled kind and added a small can of green chiles to the meat. the sour cream layer is the best part, didnt think it would set up but it does. leftovers were even better for lunch the next day